
在「捷徑」中設定自動開始
先建立含有 AirPulse「Start Pulse Tracking」動作的捷徑。再建立個人 Bluetooth 自動化操作,讓 AirPods Pro 3 連接時執行這個捷徑
打開「捷徑」
螢幕截圖使用英文 iOS 介面。每個步驟需要操作的控制項都以紅框標示
第 1 部分
建立 AirPulse 捷徑
在「捷徑」App 中新增捷徑,並加入 AirPulse「Start Pulse Tracking」動作
-
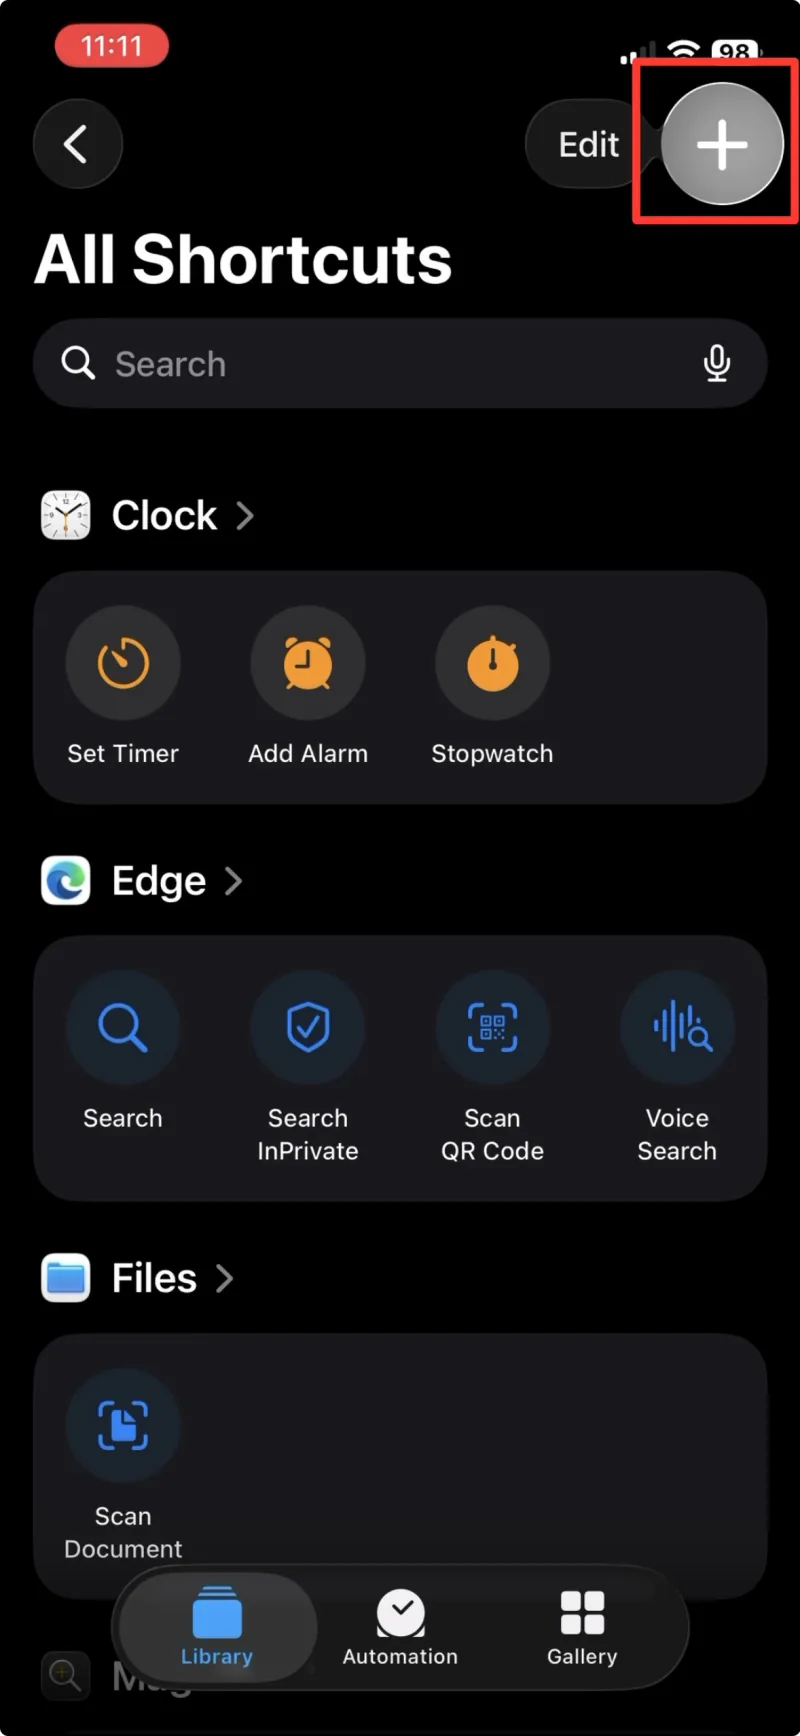
步驟 1 點一下 + 新增捷徑 -
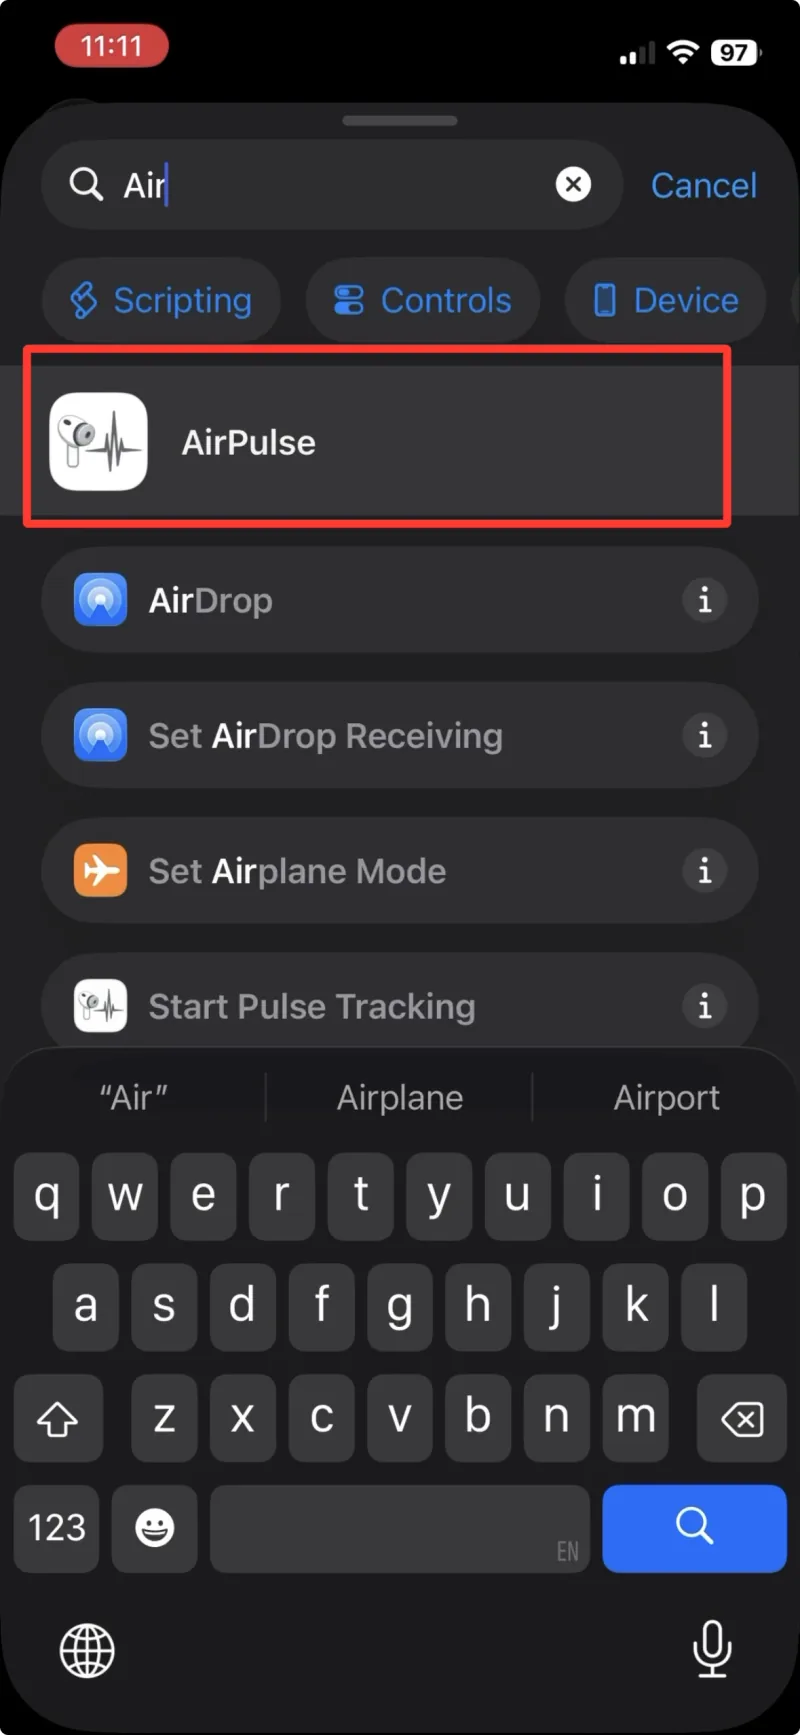
步驟 2 搜尋「AirPulse」 -
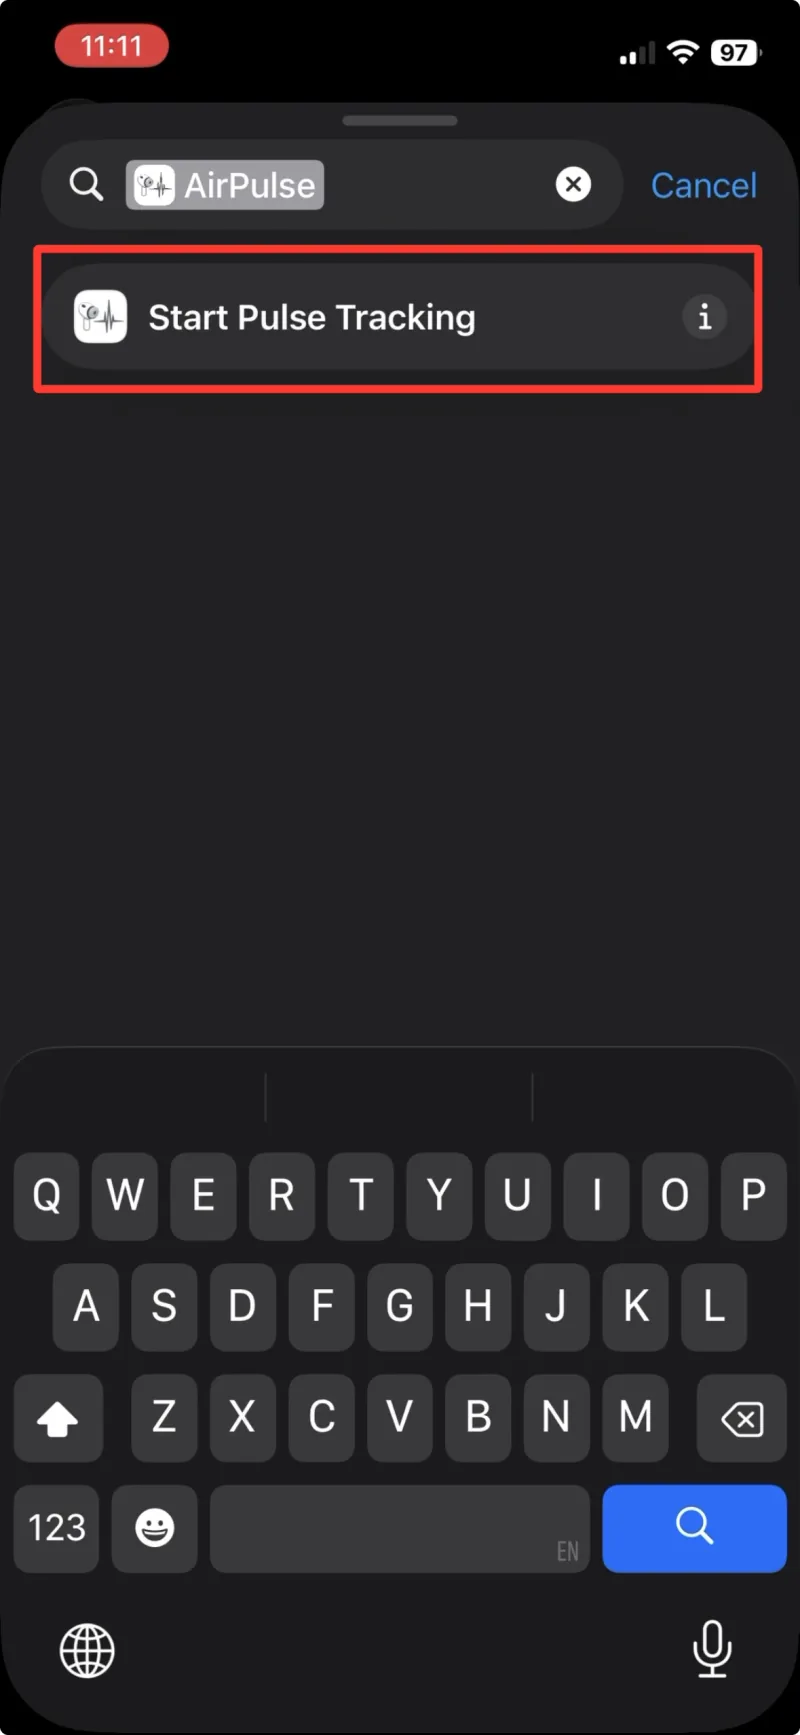
步驟 3 選擇「Start Pulse Tracking」 -
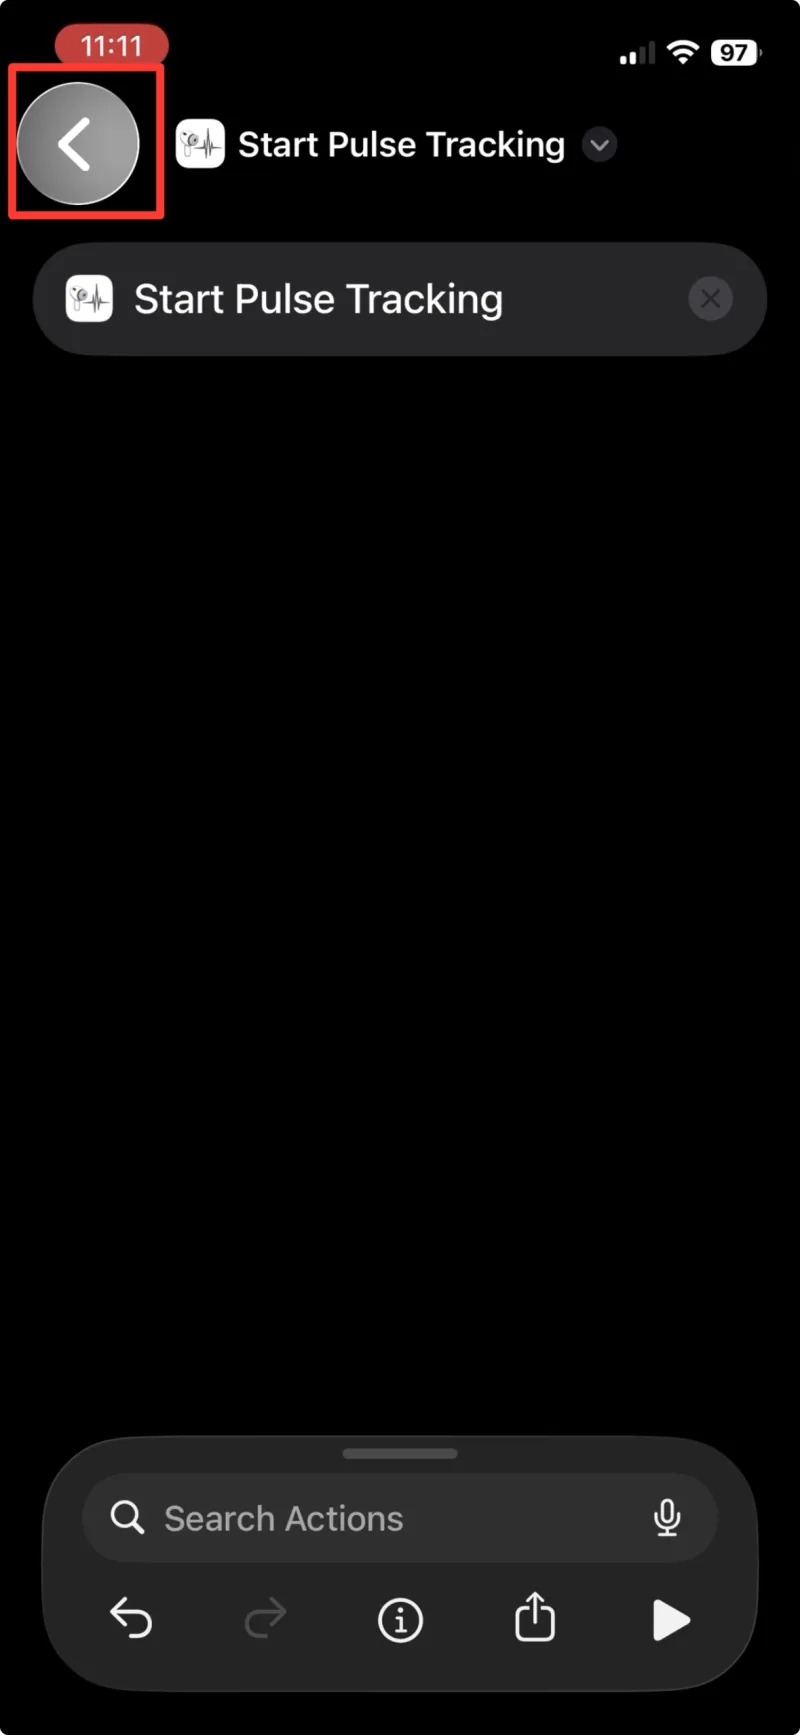
步驟 4 點一下返回箭頭關閉捷徑
第 2 部分
建立個人 Bluetooth 自動化操作
選擇 AirPods Pro 3 作為 Bluetooth 觸發條件,將自動化操作設為「Run Immediately」,再指定剛才建立的捷徑
建立自動化操作
-
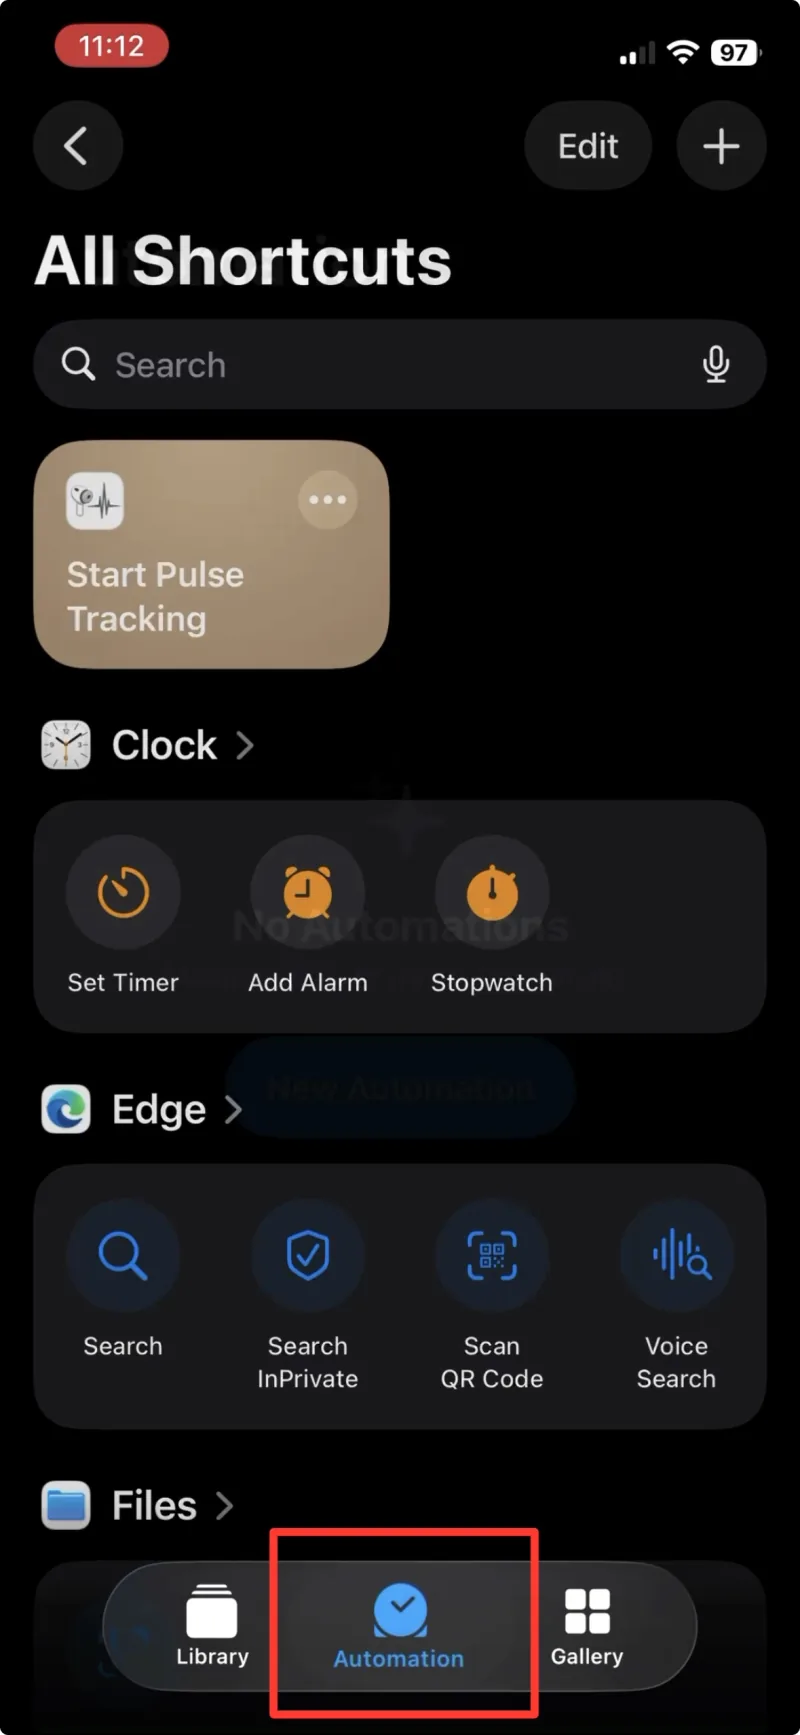
步驟 5 切換至「Automation」分頁 -
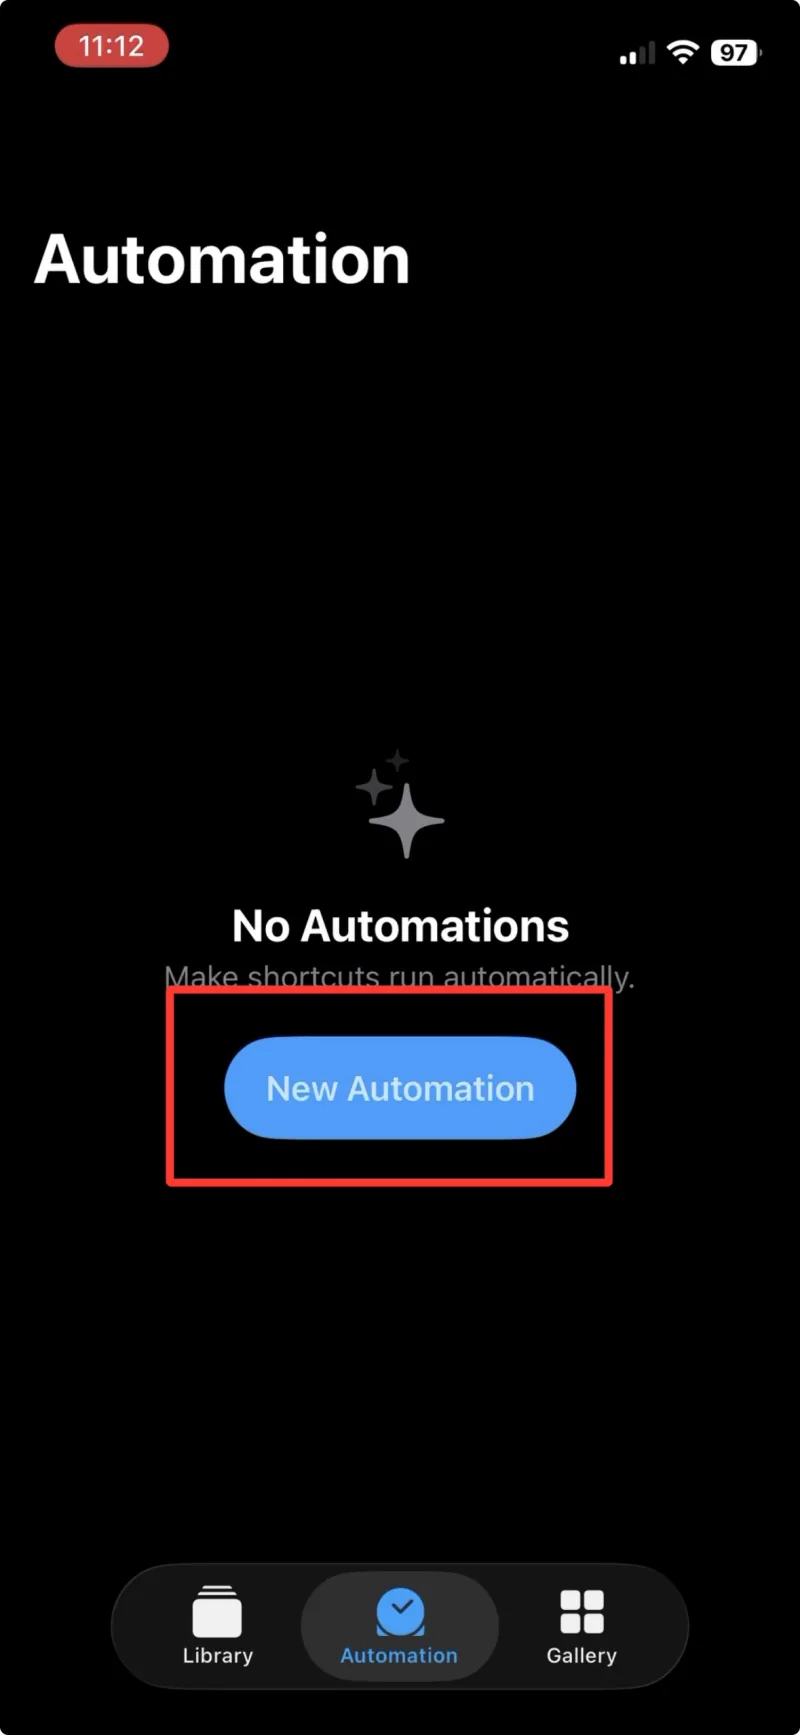
步驟 6 點一下「New Automation」 -
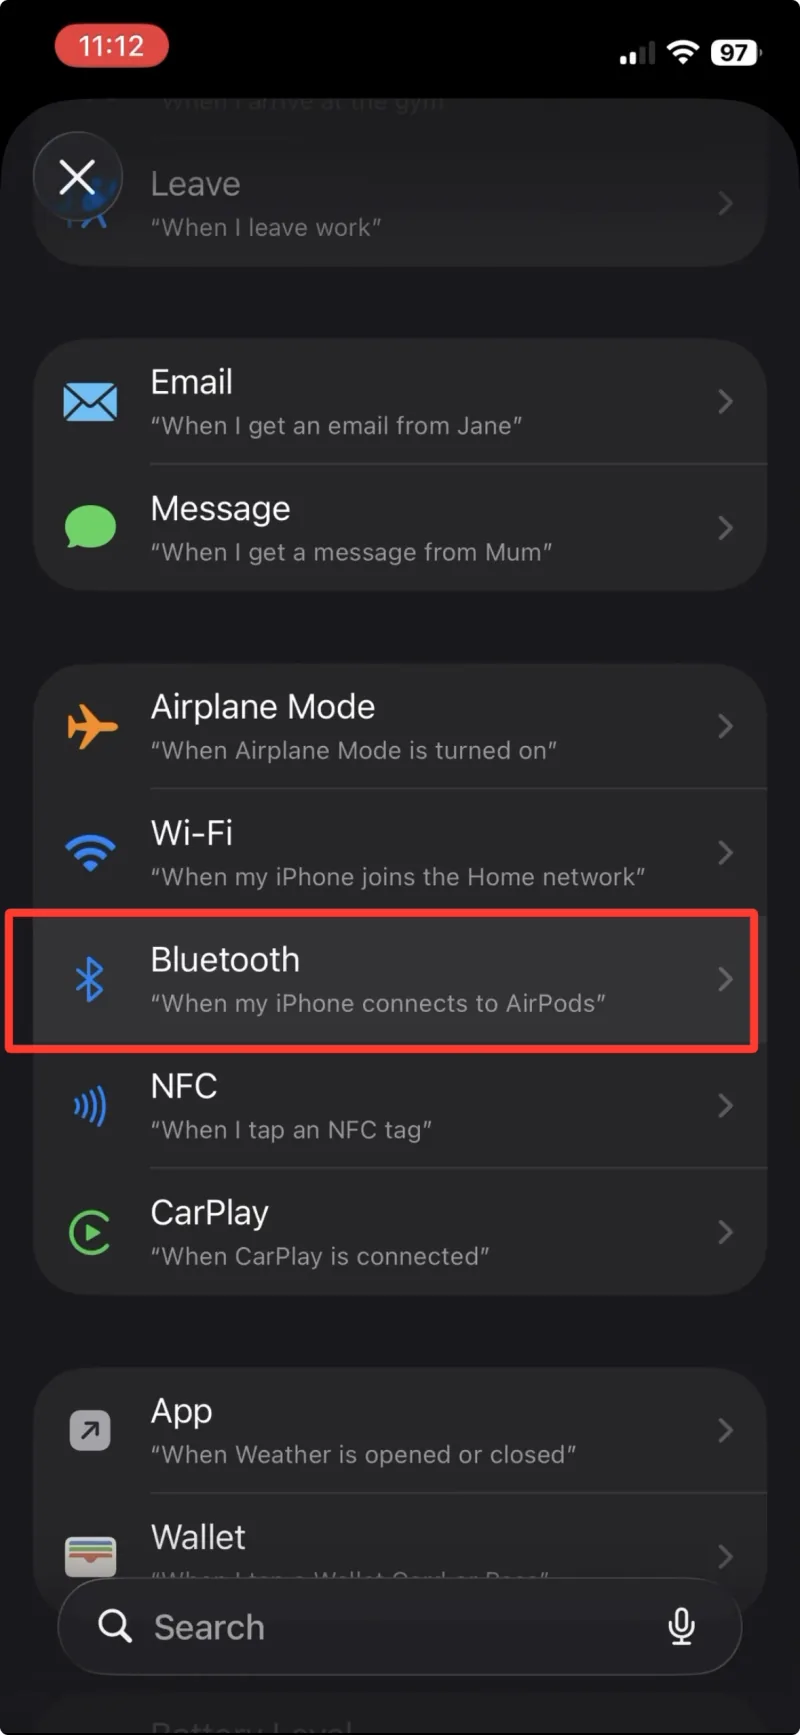
步驟 7 從列表選擇「Bluetooth」
選擇 AirPods,並設為 Run Immediately
-
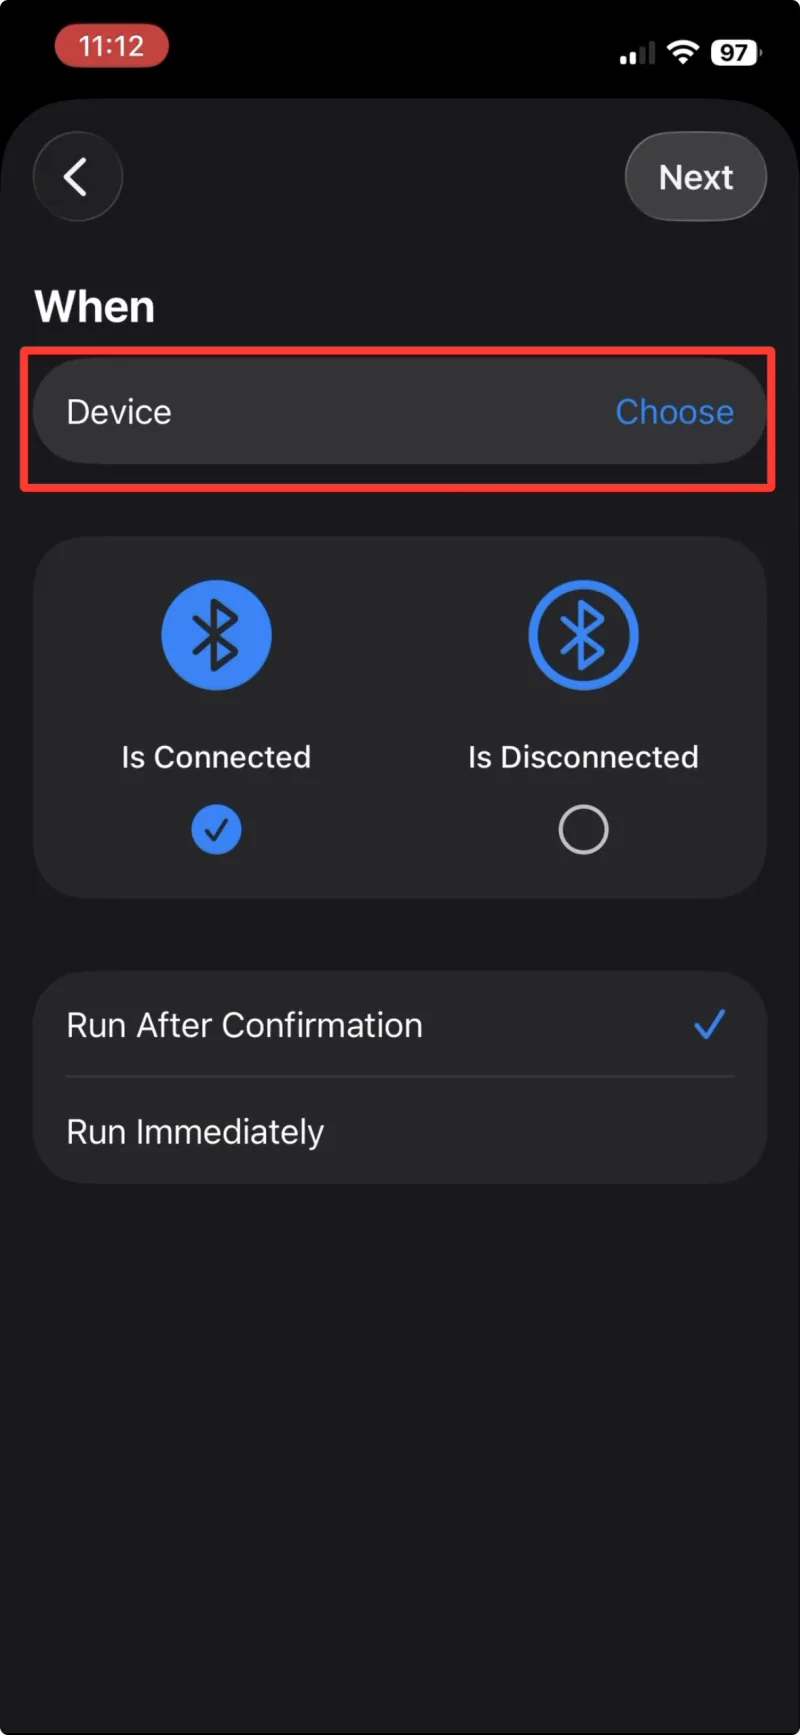
步驟 8 點一下「Device」 -
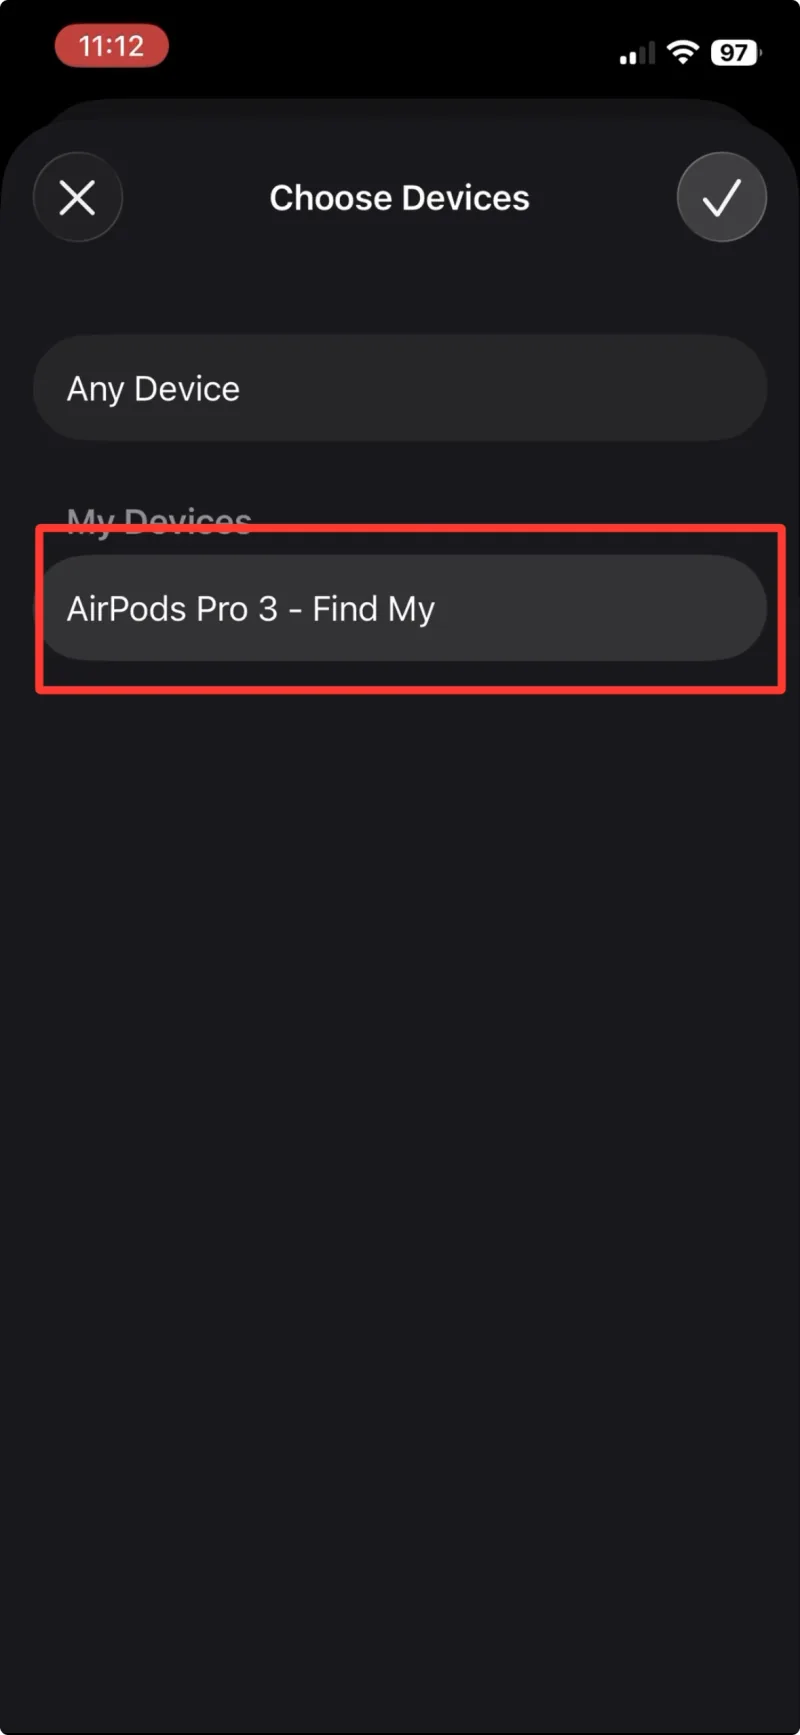
步驟 9 從列表選擇你的 AirPods Pro 3 -
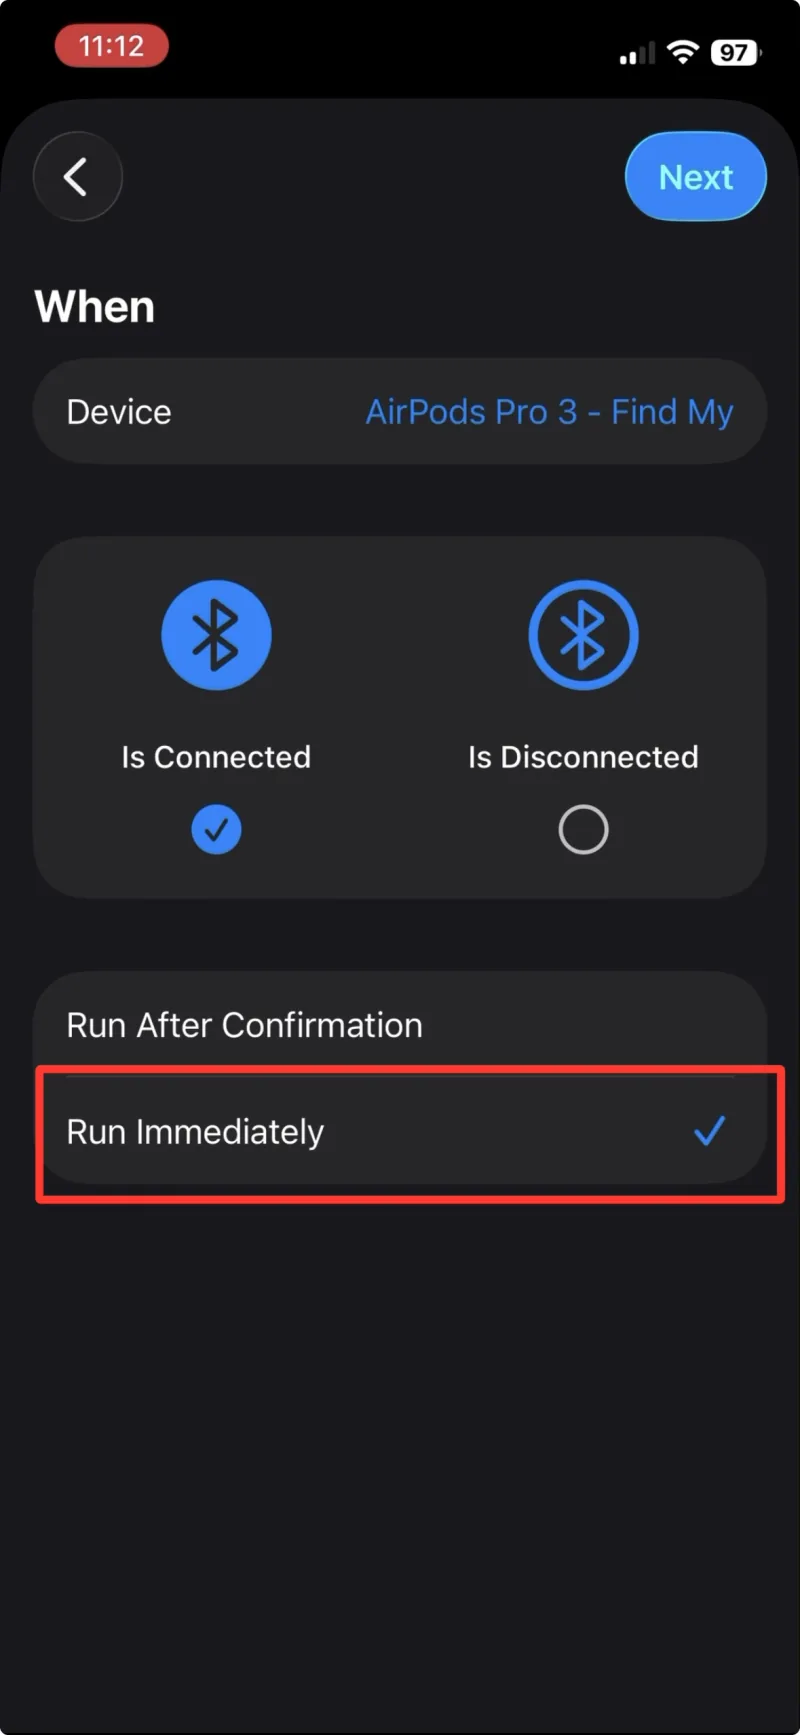
步驟 10 選擇「Run Immediately」,讓自動化操作立即開始 -
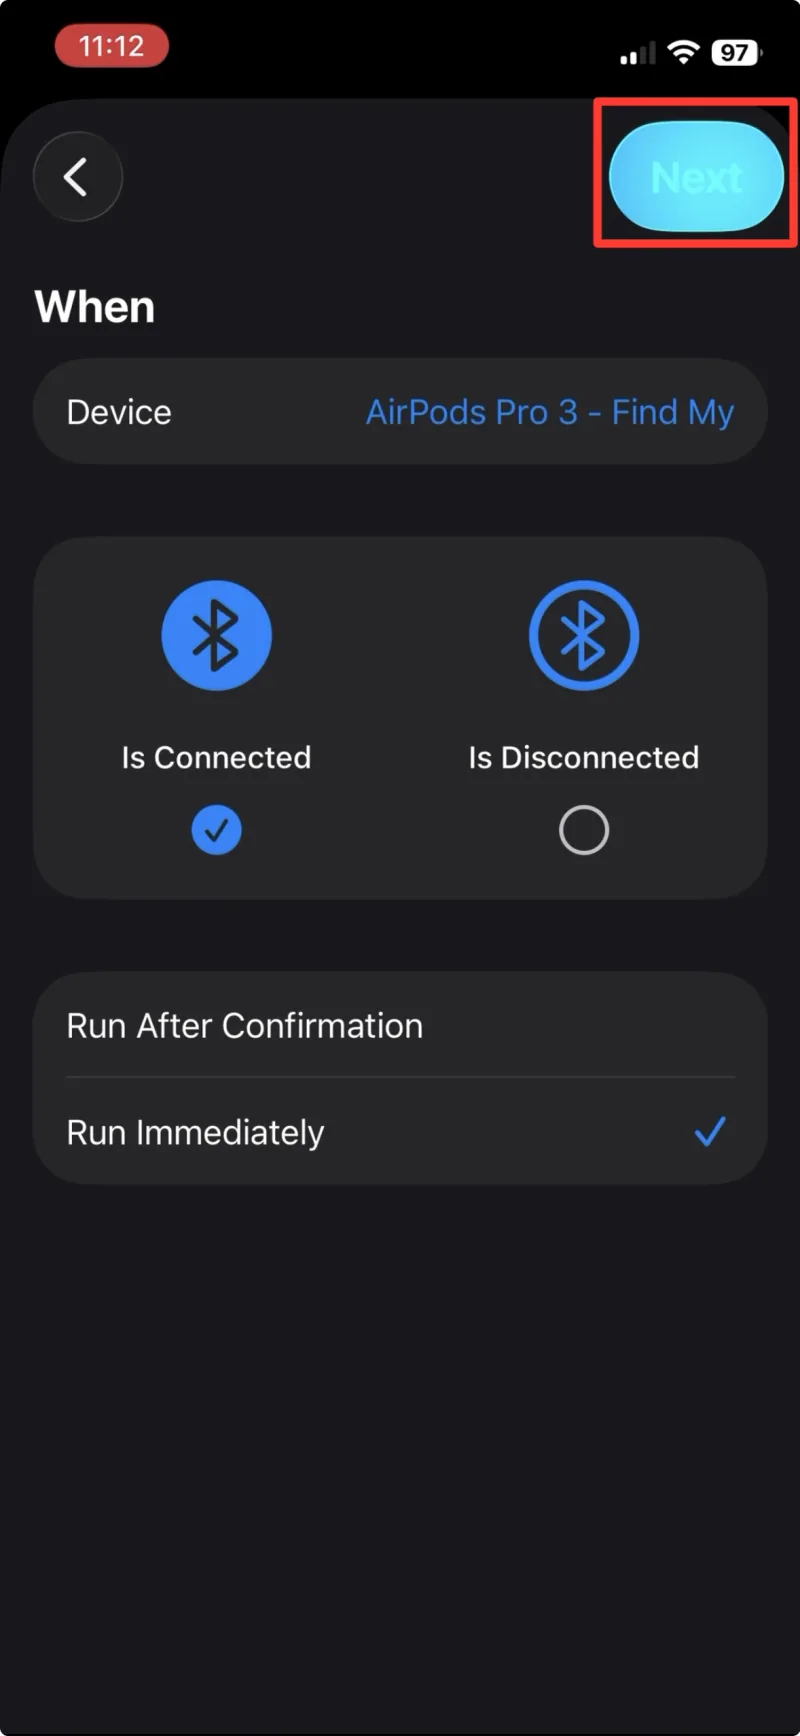
步驟 11 點一下「Next」
指定 AirPulse 捷徑
-
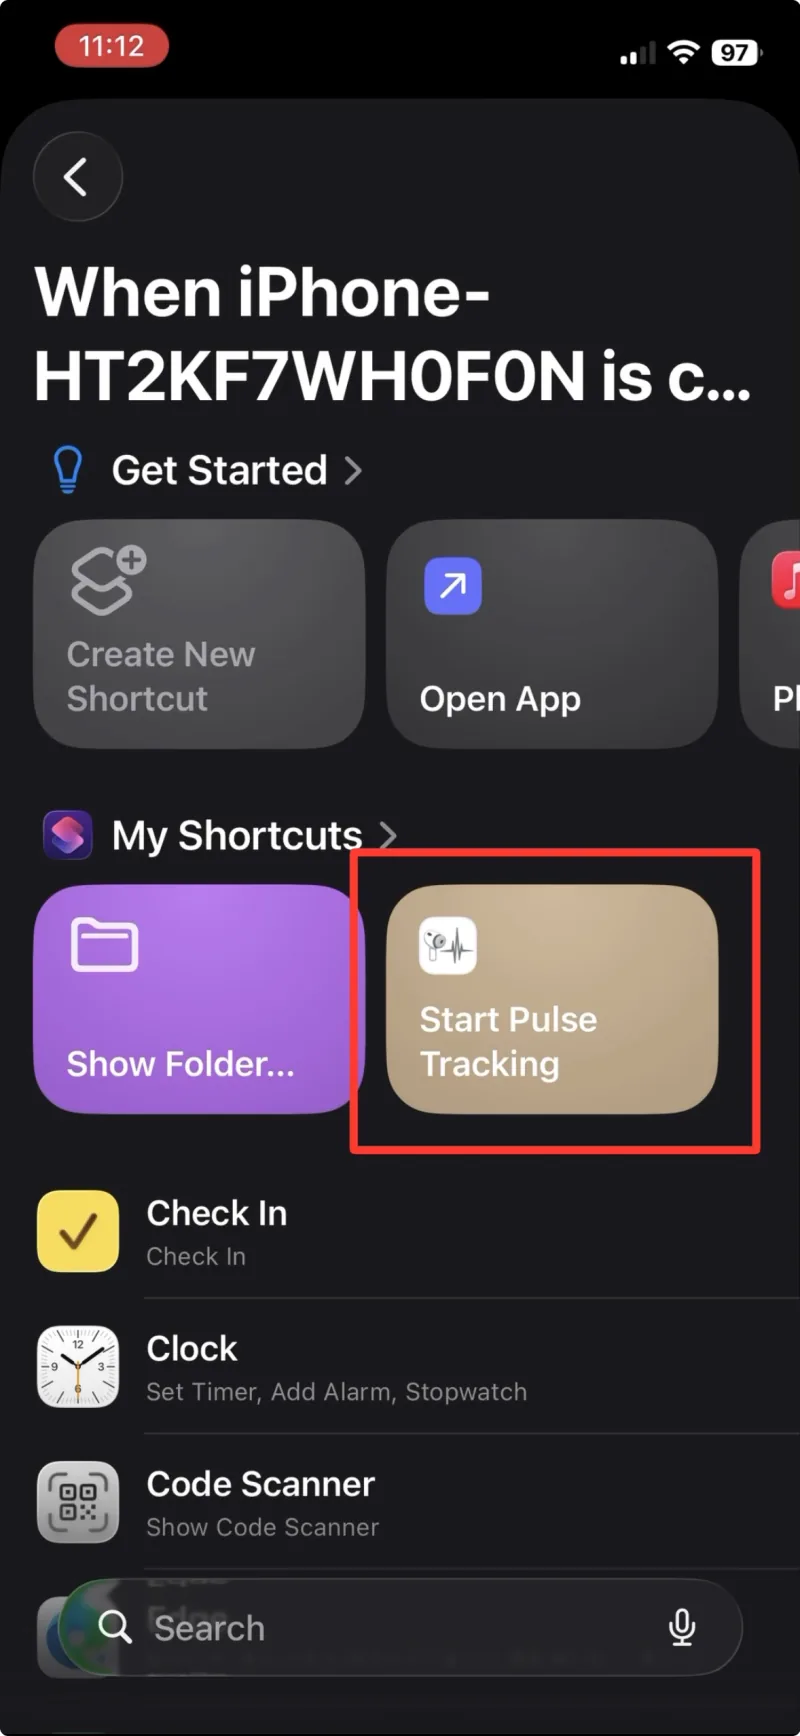
步驟 12 選擇先前建立的捷徑